ABAP Development in VS Code — A Practical Guide to ADT for VS Code
Installing SAP's official ABAP Development Tools for VS Code, connecting to a system, and the everyday features — shortcuts, transports, unit tests, ATC, SQL notebooks and the MCP server for AI assistants.
For years, ABAP development meant Eclipse (or SE80). With ABAP Development Tools for VS Code, SAP now offers an official extension, so you can write ABAP in the same editor you already use for CAP, Fiori and JavaScript.
This guide is a hands-on tour based on my own daily use: what to install, how to connect, and which features save the most time. It reflects version 1.2 of the extension.
Why VS Code for ABAP?
- One editor for everything — ABAP, CDS, Fiori Elements, UI5 and CAP side by side.
- Lightweight start-up and the VS Code features you already know: multi-cursor, command palette, Git, themes.
- AI-ready — the extension can run a local MCP server, so AI assistants can read ABAP objects in a controlled way.
Installation
- Open the Extensions view (Ctrl+Shift+X).
- Search for ABAP Development Tools and pick the extension published by SAP (
sapse.adt-vscode). - Install it and reload VS Code. Version 1.2 needs VS Code 1.109 or newer.
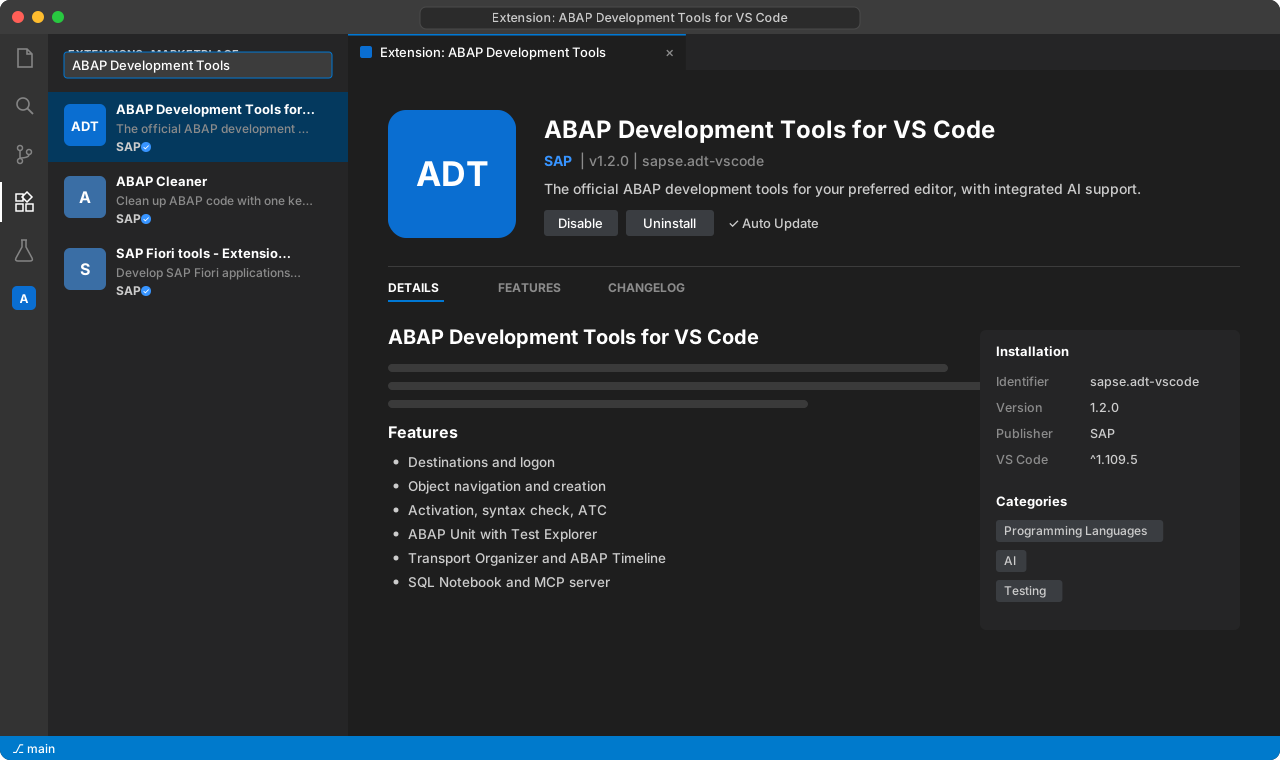
Note: the extension activates lazily — it starts its language server only when you open an ABAP object or folder.
Connecting to a system
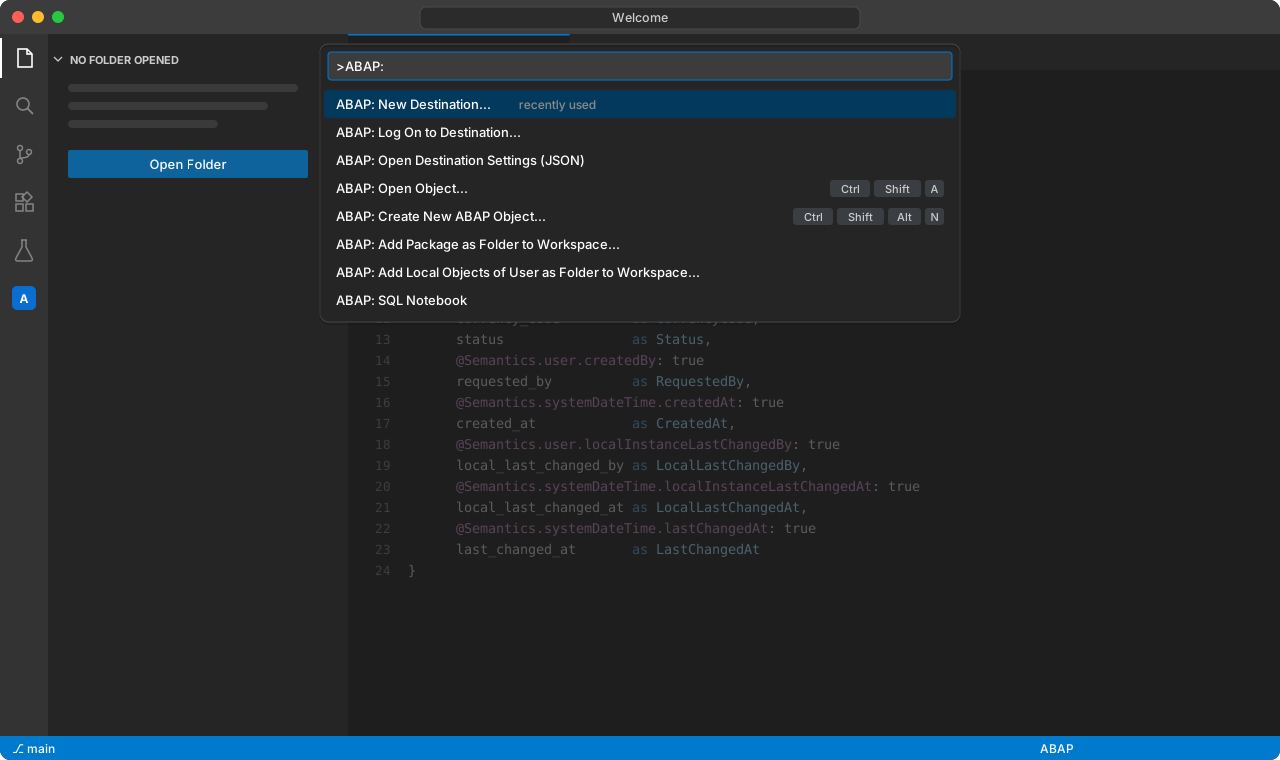
All ADT commands live in the command palette under the ABAP category (Ctrl+Shift+P, then type ABAP).
- Run ABAP: New Destination... and follow the wizard (system, client, user, logon language).
- Run ABAP: Log On to Destination... to open a session.
- ABAP: Open Destination Settings (JSON) shows all destinations as JSON — handy for copying a setup to another machine.
Bringing objects into the workspace
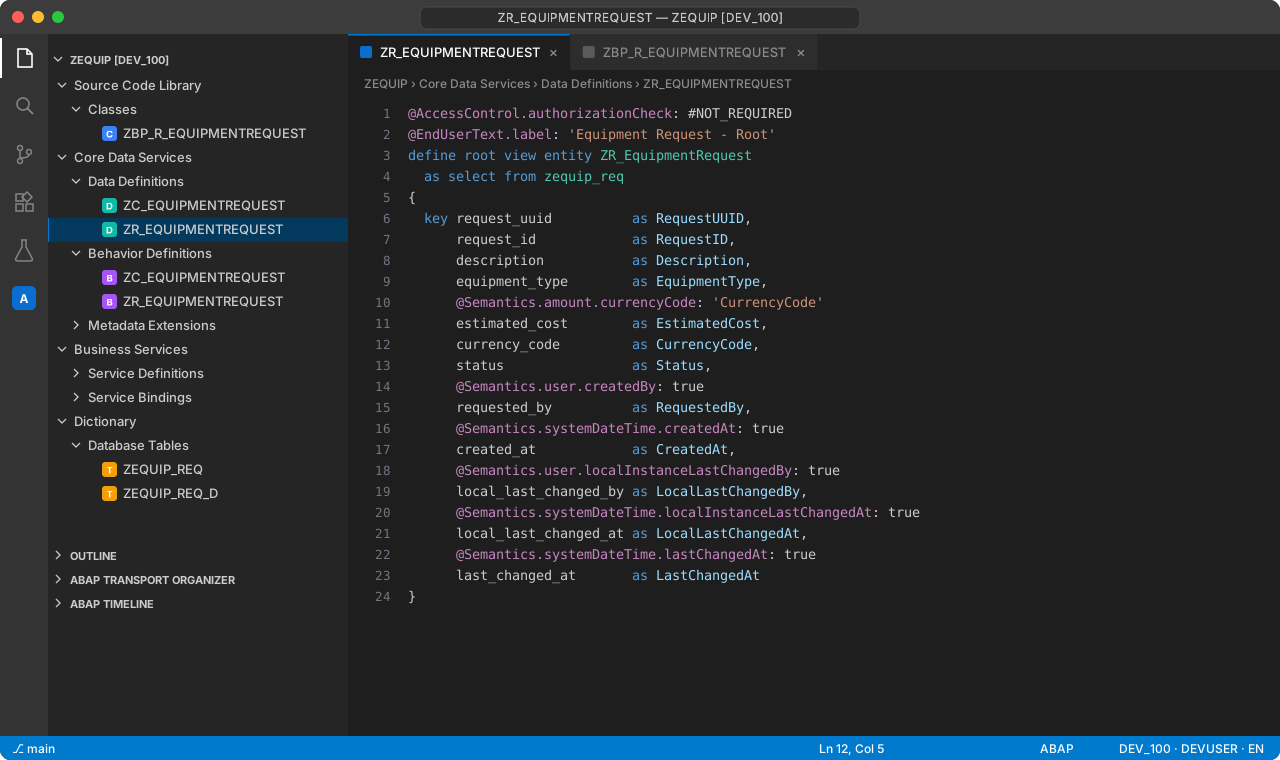
Instead of a project tree, ABAP objects appear as folders in the normal VS Code Explorer:
- Add Package as Folder to Workspace... — a package and its sub-packages
- Add Local Objects of User as Folder to Workspace... — your
$TMPobjects - Add Destination as Folder to Workspace... — the whole system
To jump straight to any object, use Open Object... (Ctrl+Shift+A), exactly like in Eclipse.
Shortcuts worth memorizing
| Shortcut | Action |
|---|---|
| Ctrl+Shift+A | Open ABAP object |
| Ctrl+Shift+Alt+N | Create new ABAP object |
| Ctrl+F2 | Check object (syntax) |
| Ctrl+F3 | Activate |
| Ctrl+Shift+F3 | Activate all inactive objects |
| F5 | Run class as console application |
| Ctrl+Shift+D | Open ABAP documentation |
| Ctrl+Shift+F10 | Run ABAP Unit tests |
| Ctrl+Shift+F11 | Run ABAP Unit tests with coverage |
| Ctrl+U | Unlock the object |
If you come from Eclipse ADT, the most important ones — Ctrl+F2, Ctrl+F3 and Ctrl+Shift+A — work the same way.
Creating objects
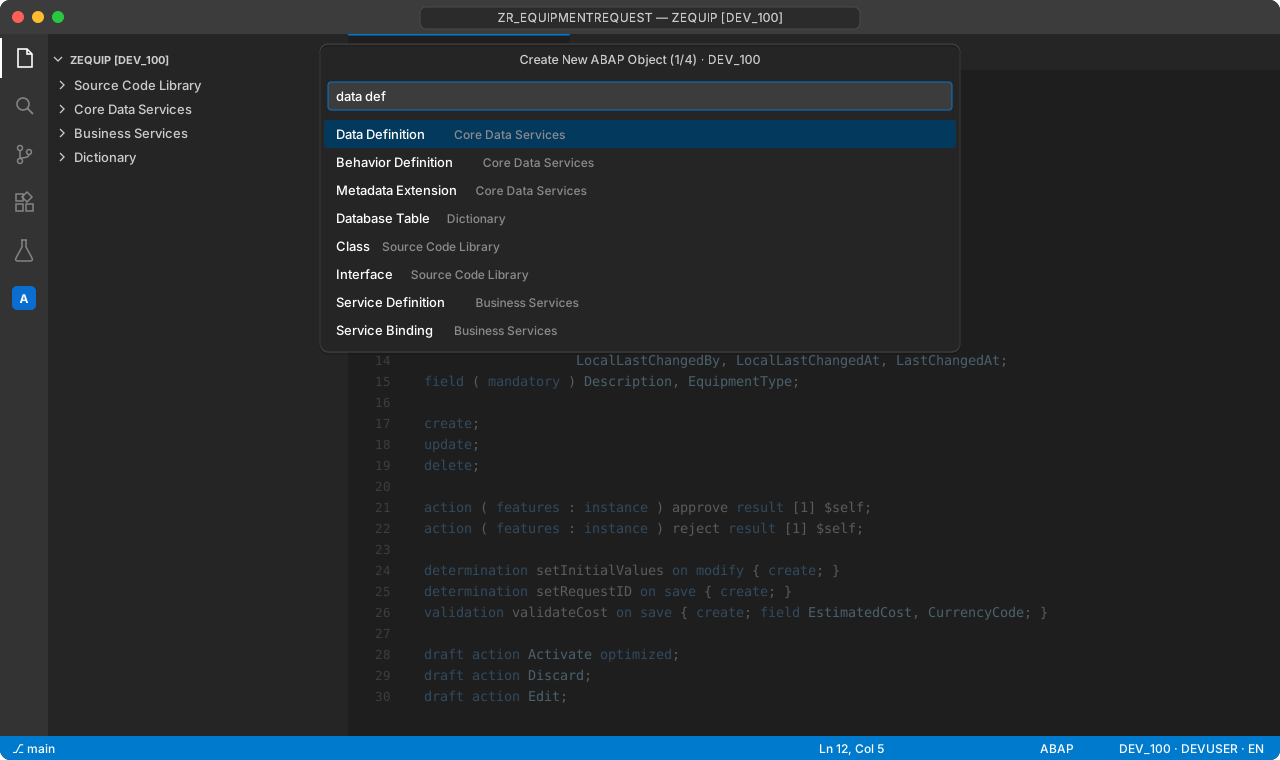
Create New ABAP Object... opens a wizard: choose the object type (class, CDS view, behavior definition, service binding...), the package and — for transportable packages — the transport request. Value helps inside the wizard search the system as you type.
Transport Organizer
The Explorer side bar gets an ABAP Transport Organizer view. You can see your requests and tasks, change the owner, add users or objects, open the changes of a request and copy request or task numbers to the clipboard.
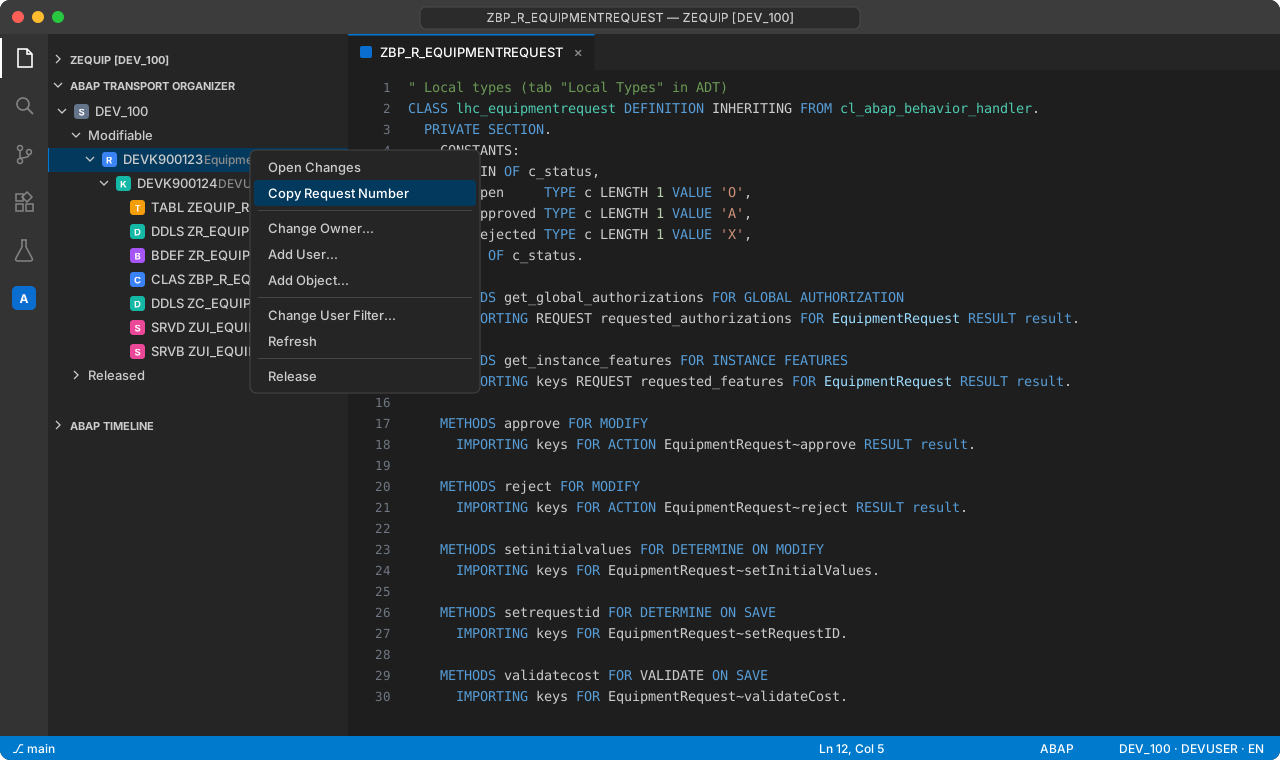
Release is available right in the context menu. Since a released transport cannot be undone, I prefer to release only through the team's agreed process.
Version history and compare
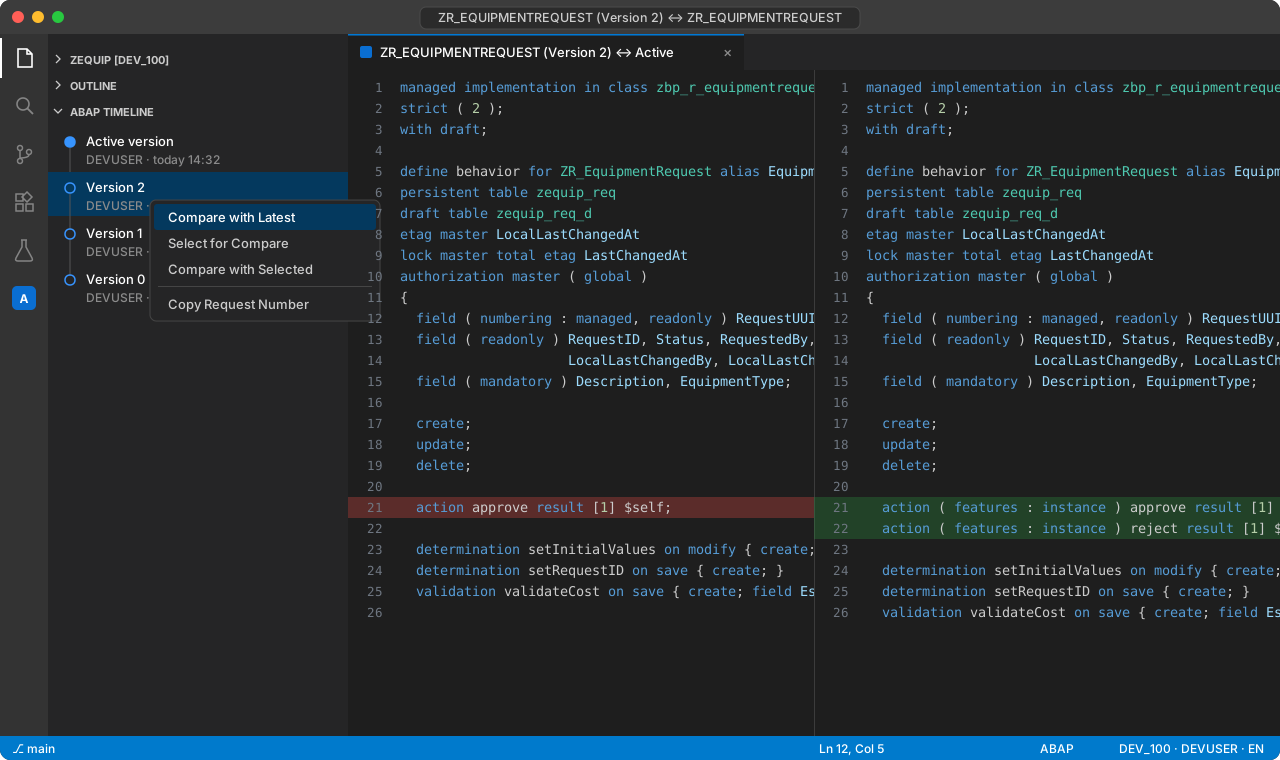
The ABAP Timeline view lists the versions of the current object. From there:
- Compare with Latest — what changed compared to the active version
- Select for Compare / Compare with Selected — compare any two versions
- Toggle Version — switch between the active and inactive source
Quality: ABAP Unit and ATC
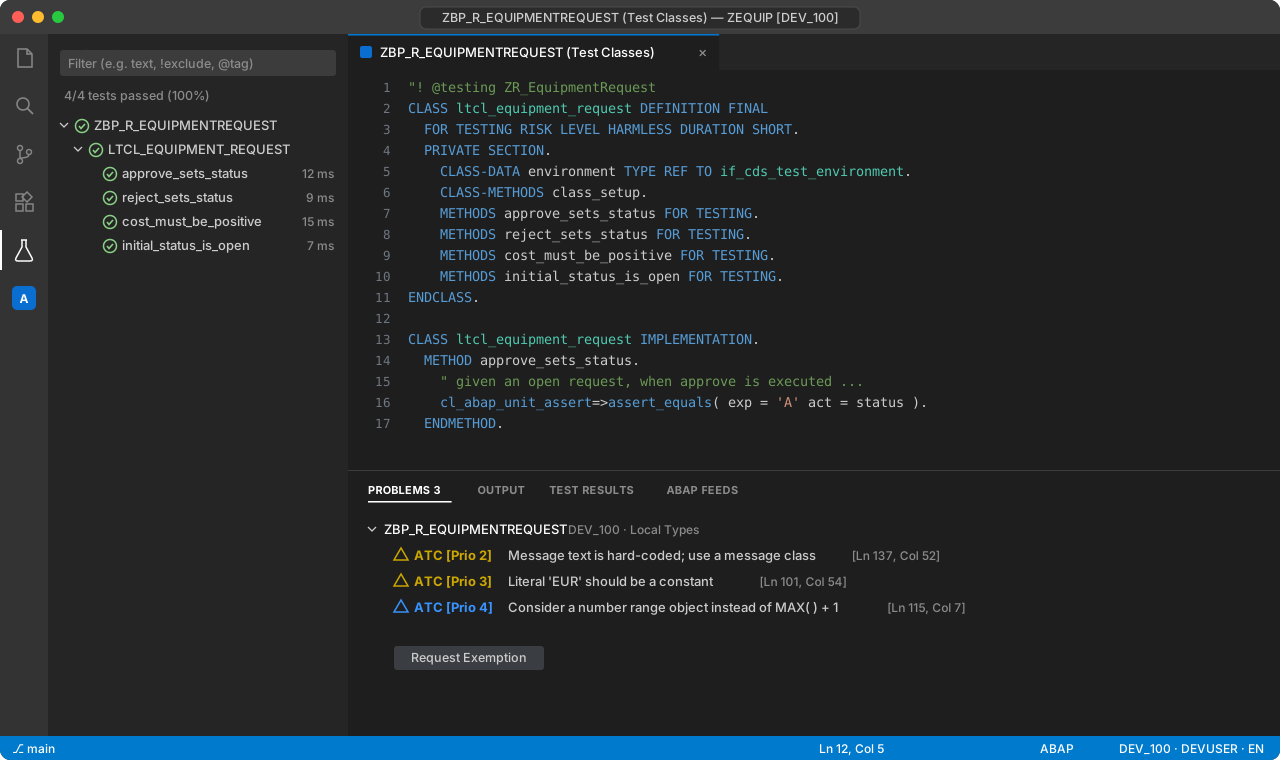
ABAP Unit tests appear in the standard VS Code Test Explorer. Run Discover ABAP Unit Tests (Ctrl+Shift+F9) once, or enable automatic discovery for the active editor; afterwards tests can be run with or without coverage.
For static checks, Run ABAP Test Cockpit checks the current object and Run ABAP Test Cockpit With... lets you pick a check variant — for example a cloud readiness variant. Findings show up in the Problems view, and you can even Request Exemption directly.
SQL Notebook for data preview
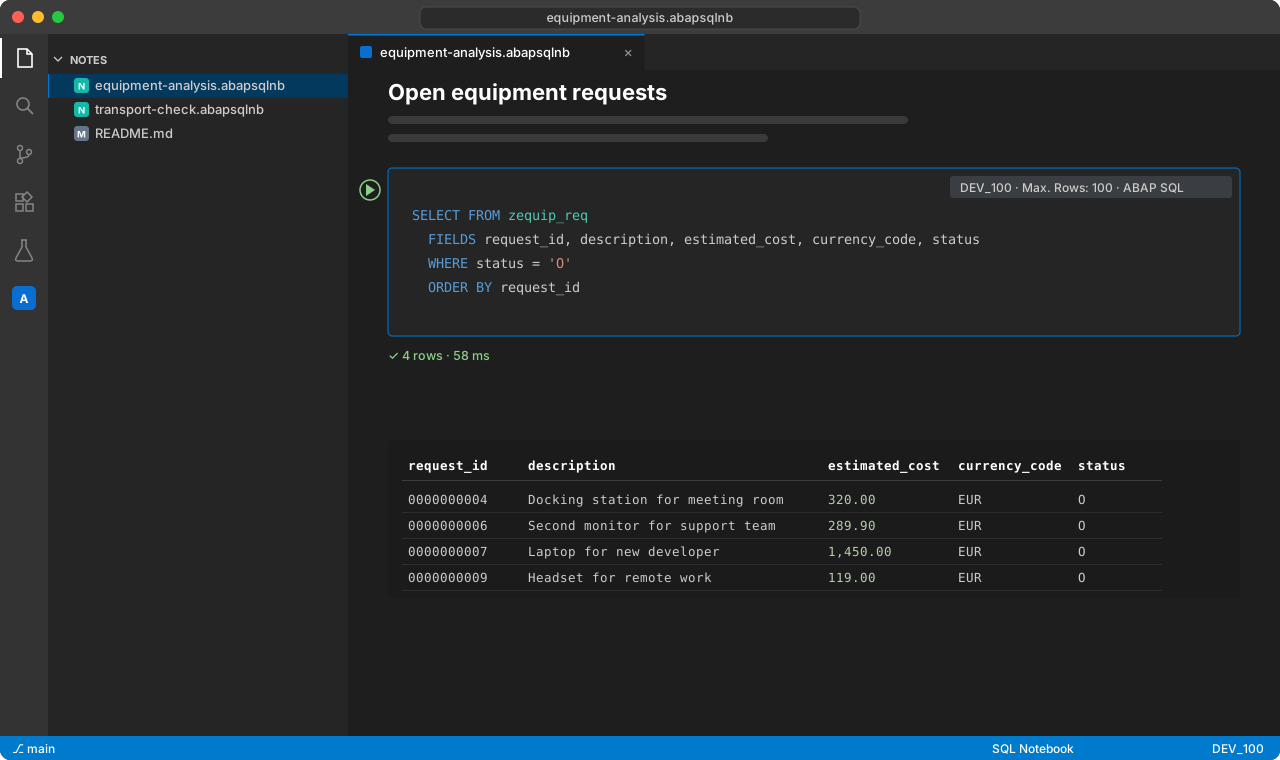
ABAP: SQL Notebook creates a notebook where each cell is an ABAP SQL query. Every cell can target a different system (Set Cell System) and has its own row limit (Set Cell Max. Rows). It is a great way to keep a set of analysis queries next to your notes.
ABAP Feeds and the debugger
The ABAP Feeds panel at the bottom subscribes to system feeds (for example runtime errors) with filters you can edit. The ABAP debugger is enabled by default (adt.debugger.enableDebugger) and uses the familiar VS Code debugging UI.
AI assistants: the MCP server
The extension can start a local MCP server (default port 2236). AI assistants that support MCP can then search, read and check ABAP objects through your logged-on sessions.
Security is built in: access restrictions are on by default, and with an empty allowlist nothing is allowed. You explicitly list which destinations and packages may be used. The edit file tool for ABAP objects is also off by default.
{
  // ADT MCP server for AI assistants – keep the allowlist on
  "adt.mcpServer.enabled": true,
  "adt.mcpServer.accessRestrictionsEnabled": true,
  "adt.mcpServer.accessRestrictions": {
    "destinations": "DEV_100_*",
    "packages-objectChanges": "ZSANDBOX*"
  },
  "adt.mcpServer.enableEditFileToolForABAPObjects": false,

  // Joule side-by-side (optional)
  "adt.joule.url": "",
  "adt.joule.editor.predictiveCodeCompletion": true
}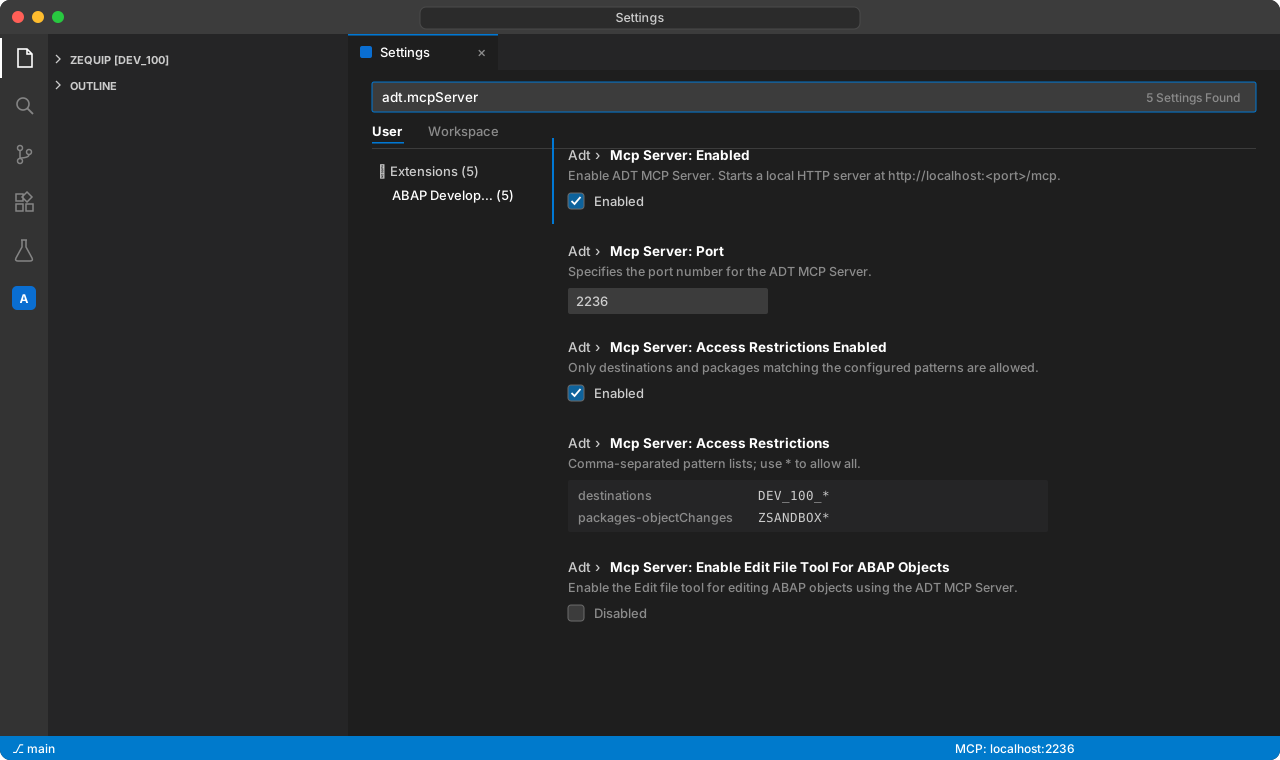
My advice: start with read-only access (empty
packages-objectChanges) and only allow changes for a sandbox package.
When you still need Eclipse
Not everything from Eclipse ADT is in VS Code yet. For those cases, Open with ADT for Eclipse opens the current object in Eclipse, and Share Link... creates a link a colleague can open in either tool.
Summary
ADT for VS Code is already good enough for daily RAP and CDS work: fast navigation, activation, transports, unit tests, ATC and data preview are all there — plus a safe way to bring AI assistants into ABAP development. Give it a try alongside Eclipse; switching back and forth is painless.
Comments